Whenever you build an email list, you are ready to create some email drip campaigns. Drip Email campaigns are known as drip marketing, lifecycle emails, automated email campaigns, and autoresponders.
So, these are a series of automated emails that will be sent out automatically when scheduled for a particular time.
You can choose how many emails to send and the rate at which to send them based on your business. These emails can be personalized with data such as the contact’s name and their buying behaviour. For instance, you might send a drip campaign to a person who has signed up for your service, who adds an item to their online cart, or maybe makes a purchase.
It is always a daunting task to set up a drip email campaign. So, we have included a complete guide on how you can send a drip email campaign from GrowMeOrganic.
Things To Know Before Setting Up a Drip Campaign
✅Before creating a campaign, make sure you have an audience.
✅If you don’t have subscribers in your audience, import your contacts or invite people to subscribe with a signup form where they can submit their email and other details, as shown below.
What is an Email Drip Campaign?
Drip campaigns are automated sets of emails that are sent to your audience. These are sent on a set timing based on the prospect’s behaviour. It helps businesses to stay in touch with an audience in a personalized way. Personalization includes contacts’ names, company info, and user behaviour.
Drip campaigns will have a queue of already written emails that are sent one by one. By integrating a Real Estate Drip Email approach, you can effectively nurture leads and drive higher engagement.
For instance, if any user has subscribed to your newsletter, then you can send a welcoming email drip campaign. Then, after two days, send an email that shows some of your products or services based on user interest.
Similarly, if any customer has been hovering around your “premium services” page for a few days but hasn’t bought it yet, setting a drip campaign could help. This will send them an email automatically with some reasons why they should purchase the premium plan.
But are drip campaigns really helpful? Yes, they are useful if emails are sent through an automated tool such as GrowMeOrganic. So, let’s go through the benefits of setting an email drip campaign through GrowMeOrganic.
Setting Up an Email Drip Campaign through GrowMeOrganic

Choose a Campaign Type
You have an option to select instant or sequence campaigns according to your business goals. So, let’s take a look at both types of campaigns you can create in GrowMeOrganic.

🎯Instant Campaign
This is the most common type of campaign in which you can design and customize your content for marketing communication, such as newsletters, introductions to new products, etc. You can send emails only once to the list of contacts.
🎯Sequence Campaign
The simplest form of a mass email (first email and follow-ups) you can send until your contacts reply. This type of campaign is most suitable for sales or prospecting.
Warm Up Emails and Import Your Contacts Before Creating a Campaign
Before selecting and creating a campaign, you will have to warm up the emails, import your contacts in CRM and create a template that you want to use based on your business goal.
Email WarmUp
Email Warmup is the process of building the reputation of new email accounts to increase their sending limit. In the warmup, process emails are sent from a new email account with a gradually increasing the number of emails sent each day.
Every email service provider (Gmail, Yahoo) gives daily sending limits whenever a user creates a new email account. For example, Google provides 2000 emails/day. So, ideally, it takes 8-12 weeks to achieve maximum deliverability of emails, depending upon volume and engagement.
How to Add a New Email Account In GrowMeOrganic
To add your email account in GrowMeOrganic, follow these steps-
📌You’ll have to allow your email service provider (Gmail, Yahoo, Amazon SES, or any SMTP) to connect with third-party apps.
📌Set up an email provider’s SMTP server on GrowMeOrganic.
📌Then enter your Gmail account credentials (scroll down to fill in the complete form).
Why & How to set up those emails for warm-up?
Email warm-up is important if you are planning to send a large volume of cold email campaigns with a new account to make sure your emails will land in inboxes.
For every email campaign, good engagement is always important. So, if the emails are well warmed up before they are sent, they will avoid the spam box and will get delivered to the inbox resulting in a higher open rate.
The process to set up your Warm-Up emails with GrowMeOrganic-
✅Sign in to your GrowMeOrganic dashboard.
✅Hover over to the Senders Tab in GrowMeOrganic CRM (In this, you will connect a new email account to GrowMeOrganic CRM)
✅Connect your email account (Gmail, Yahoo, Hotmail) with GrowMeOrganic if you haven’t done it yet.
✅Once your email account is connected, you’ll be able to see the warm-up button.

✅In the warm-up tab, you’ll see a self-explanatory pop-up notification asking you to set daily send limits along with the number of emails to increase every day.
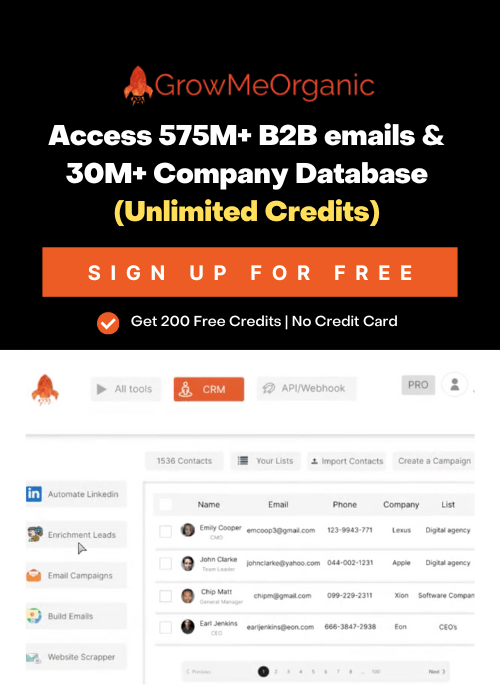
How to import contacts into the CRM
Mostly, you already have a list of potential leads, so you will need to import it. There are two ways to import contacts:
Import contacts from CSV
👉Goto lists inside CRM.
👉Click on create a new list.
👉Then you can import contacts with an external csv file with all your email addresses inside it.
👉Click the Import contacts button and make sure the list is in the accepted format.

Transfer the extracted contacts directly to GrowMeOrganic
👉Press From LinkedIn (Premium and Sales Navigator).
👉You will get a pop-up notification wherein you can extract contacts from LinkedIn and other sources and can be transferred directly to GrowMeOrganic CRM.

Creating a new email template
These templates are the emails that we craft. Let’s go through the few steps for creating a template-
👉Go to create and edit a template. You will see the option of a gallery of templates (choose from different Html templates) and a gallery of cold email templates (pre-written cold email texts).
👉Then select an Image personalization project (add a personalized image within an email).
👉You can use placeholders in certain places to replace the recipient’s name and spin syntax to make the article look a little bit different in different inboxes (makes it look a little human).


👉It is important to mention the limit of emails to send per day for a particular campaign.
👉Also, select the timezone if you want to send the emails to a particular time zone.
Configure An Instant Campaign
After selecting the instant campaign, you will be able to create and edit a campaign.

⚡Add the name of the campaign. Try to avoid names like Campaign 1 and Campaign 2; instead, they should reflect the goals you are trying to achieve.
⚡Then choose the sender to use. It is the name of the sender that will be used for sending the campaign.
⚡Inside the list to use, select the email list you want to send your emails to.
⚡Then add a delay between each email. Adding a delay will let you create delays between each email.
⚡Then select the time and date when you want your campaign to start.
⚡There is an option to assign campaigns to a particular member of your team and add them to a folder.
⚡Tick the checkbox to prevent duplication of emails sent. This will prevent duplication of emails if they are already present in the running campaign.
⚡Then tick the checkbox of Track Clicks and Track Opens. This will track how many times your leads have opened or clicked on the link you send in your email.

⚡Select the timezone according to the geographic location of your audience.
⚡The next option is to limit the number of emails that you want to send per day.
⚡Then select the email template that you have created, as told above.
⚡Lastly, select the list in which you want your prospect to move once it is converted.
Configure Sequence Campaign

🔸Firstly, write the campaign name that reflects the goals you are trying to achieve.
🔸Select the sender to use. It is the name of the sender that will be used for sending the campaign.
🔸Then select the list to whom you want to send the emails. A list should have a minimum of one contact and a maximum of 5000 contacts.
🔸Add a delay between each email, and this will let you create delays between follow-up emails. Then select when you want your campaign to start.
🔸There is an option to assign campaigns to a particular member of your team and add them to a folder.
🔸Tick the checkbox to prevent duplication of emails sent. This will prevent duplication of emails if they are already present in the running campaign.
🔸Then tick the checkbox of Track Clicks and Track Opens. This will track how many times your leads have opened or clicked on the link you send in your email.
Scheduling the campaign to ensure it is delivered at the right time
🔸It is important to mention the limit of emails to send per day for a particular campaign.
🔸Also, select the timezone if you want to send emails for a particular timezone.

Adding email follow-ups
For sending email follow-ups, follow these steps-
👉Inside emails to send, select the type of email you want to send (welcoming email, thank you email, etc.), what to send from the drop-down box & delay in every email.
👉Similarly, you can select Email 1, Email2, Email3, and so on by selecting the add a new follow-up email.

Moving the prospect to a different list if they don’t reply or convert
You can move the prospect based on their course of action. For instance, if the prospect is converted or has replied, then you can move the contact by selecting from the drop-down list.

Sending Email and Tracking the campaigns
Once you’ve built your campaign, just click Save & Start. You will be redirected to the Campaigns list, where you can follow the status, such as opened emails, clicked emails, blocked emails, out-of-office emails, etc.
You can also find out how many emails haven’t reached the recipients and how many people have unsubscribed.
Simply go to the All tools tab and click on the campaign you want to analyze. So, use this tool to automate outreach and make it easier to build and customize the campaigns, improving rates and workflow.
![]()