Gmail SMTP Settings
Anant Gupta
So, you’ve decided it’s time to set up Gmail’s SMTP settings—maybe for your business, a new app, or just to make your email life a little smoother.
If you’re feeling a bit overwhelmed by all the technical talk, trust me, you’re not alone!
When I first tried to figure out how to configure SMTP, I kept asking myself, “Isn’t there an easier way?”
The good news is: yes, there is—and you and I are about to walk through it together.
Think of this as our mini project. I’ll be sharing everything I know, and you’ll be following along, step by step.
I’ll explain what SMTP actually means (spoiler: it’s not as scary as it sounds), why you need it, and how to plug it into Gmail without breaking a sweat.
Whether you’re a total beginner or just need a refresher, I’ve got your back.
So, grab your favorite drink, open up your Gmail, and let’s do this together.
By the end of this guide, you’ll not only know how to configure Gmail SMTP settings—you’ll be able to help your friends with theirs, too!
Ready to become a bit of an email pro? Let’s jump in!
What is Gmail SMTP Settings?
Gmail SMTP settings are the configuration details you need to send emails from your Gmail account through another application, website, or email client.
SMTP stands for “Simple Mail Transfer Protocol,” which is just a fancy way of describing the system that sends your emails from one server to another.
When you use Gmail’s SMTP settings, you’re basically allowing another platform—like Outlook, WordPress, or a CRM—to send emails on your behalf using your Gmail account.
This comes in super handy if you want to automate email notifications, send newsletters, or manage all your messages in one place.
Here’s a quick breakdown of what Gmail’s SMTP settings typically include:
- SMTP Server Address: smtp.gmail.com
- Port Number: 465 (SSL) or 587 (TLS/STARTTLS)
- Username: Your full Gmail address (e.g., you@gmail.com)
- Password: Your Gmail password or App Password (for accounts with 2-Step Verification)
- Security: SSL or TLS encryption for safe, secure email delivery
In short, Gmail SMTP settings are the keys that let you send emails from your Gmail account, no matter what tool or device you’re using.
Gmail POP and SMTP Settings
Gmail POP and SMTP settings are the technical details you need to send and receive emails through your Gmail account using another email client (like Outlook, Thunderbird, Apple Mail, or even certain apps and websites).
Let’s break down what each does:
What is POP?
POP stands for “Post Office Protocol.”
It’s a method used to download emails from Gmail’s servers to your computer or device, so you can read them offline.
With POP, emails are typically removed from Gmail once they’re downloaded, unless you change the settings to leave a copy in your Gmail inbox.
Gmail POP Settings:
- POP Server: pop.gmail.com
- Port: 995
- Security: SSL required
- Username: Your full Gmail address (e.g., you@gmail.com)
- Password: Your Gmail password or App Password (if 2-Step Verification is enabled)
Why do you need these?
If you want to use Gmail in another app or device, you’ll need these settings.
Enter them when you set things up.
They help your emails get sent and received safely. They also let your email app talk to Gmail’s servers.
In summary:
- POP lets you download and read Gmail emails in other apps
- SMTP lets you send emails from your Gmail account through those apps
Having these settings handy makes it easy to connect Gmail to almost any email program you like!
How to Configure Gmail for POP Access
Here’s how to set up POP for Gmail, broken down into clear steps:
- Log in to your Gmail account and click the Settings icon in the top right.

- Select “See all settings” and go to the “Forwarding and POP/IMAP” tab.

- In the “POP Download” section, choose either “Enable POP for all mail” or “Enable POP for mail that arrives from now on,” based on your needs.

- Click “Save Changes” at the bottom.

- Open your third-party email client (like Outlook).
- When prompted for incoming mail server details, enter:
- Incoming Mail Server (POP): pop.gmail.com
- Port: 995
- SSL: Yes (required)
- Username: your full Gmail address
- Password: your Gmail password
- Server timeout: Set to more than 1 minute (5 minutes recommended)
- Display Name: your name
Following these steps will let you receive Gmail emails in your chosen email client using POP.
Methods to Set up Gmail SMTP Servers
1. Gmail’s SMTP Server (smtp.gmail.com)
Who is it for?
Anyone with a regular Gmail account (e.g., you@gmail.com).
How it works:
This is the standard method for sending emails through your Gmail account from other email clients (like Outlook or Apple Mail), apps, or websites.
How to set it up:
- SMTP Server: smtp.gmail.com
- Port: 465 (SSL) or 587 (TLS)
- Authentication: Yes (you must log in with your Gmail address and password, or an App Password if you use 2-Step Verification)
- Security: SSL or TLS required
Common uses:
- Sending emails from third-party apps (like WordPress or CRMs)
- Connecting your Gmail to desktop or mobile email apps
- Server Address: smtp.gmail.com
- Username: Your Gmail Address (e.g. example@gmail.com)
- Password: Your Gmail Password
- Port Number: 587 (With TLS)
- Alternative Port Number: 465 (With SSL)
- Internet Protocol: Dynamic IPs Allowed
- Sending Limits: A registered G Suite user can’t relay messages to more than 10,000 recipients per day.
- Server Address: smtp-relay.gmail.com
- Username: Your Gmail Address (e.g. example@gmail.com)
- Password: Your Gmail Password
- Port Number: 587 (With TLS), 465 (With SSL) and 25 (with TLS/SSL)
- Internet Protocol: One or more static IP addresses are required.
- Sending Limits: 2,000 Messages per day.
- Server Address: aspmx.l.google.com
- Username: Your Gmail Address (e.g. example@gmail.com)
- Password: Your Gmail Password
- Port Number: 25 (TLS not required)
- Internet Protocol: Dynamic IPs allowed
- Restriction: Email can only be sent to Gmail or G Suite users.
- Sending Limits: Per user receiving limits apply. This option restricts sending messages to Gmail or G Suite users only.
Notes:
There are sending limits (about 500 emails/day for regular Gmail) and emails will show as sent “via gmail.com.”
Steps to Create App Password
If you use 2-step verification on your Google account, your email client might not support verification codes.
In that case, you’ll need to set up an App Password.
Do this before you configure Gmail’s SMTP server settings.
Why is this necessary?
Two-step verification can prevent some secure apps or devices from connecting to your email account.
An App Password lets these apps or devices access your account, even when 2-step verification is turned on.
If you don’t use two-factor authentication, you can skip these steps.
- Set Up Security First
- Visit your Google Account security page
- Find and enable 2-Step Verification
- Head to the App passwords section


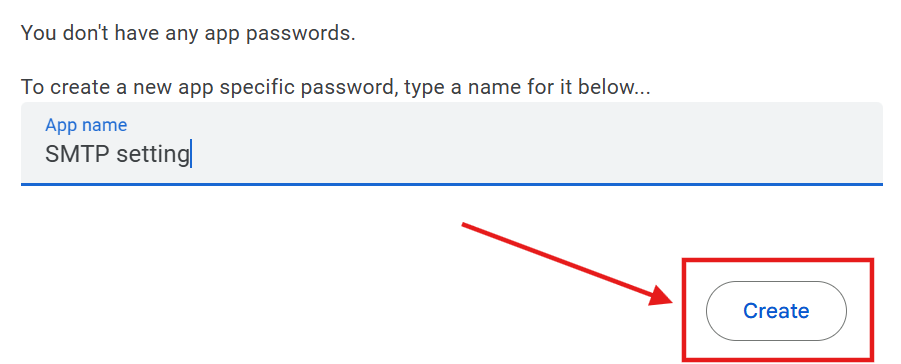
2. Generate Your App Password
- Look for the “App name” field
- Type in “SMTP”
- Click Generate

3. Configure SMTP Settings
- Visit the SMTP test page
- Enter smtp.gmail.com as your server
- Use port 465
- Choose SSL for security
- Input your Gmail address as username
- Paste your new app password
4. Final Testing Steps
- Enter your Gmail address in “From Email”
- Add recipient’s email in “To Email”
- Hit “Test it” to verify connection
- Check both inbox and spam folder
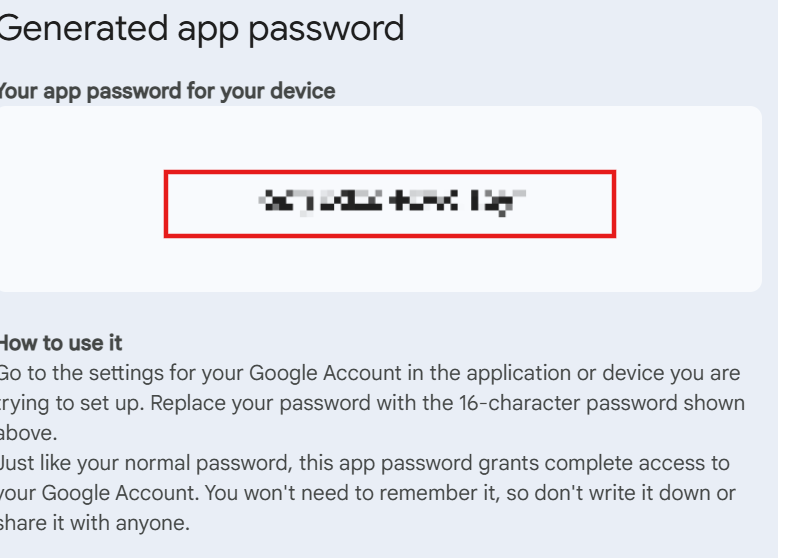
Quick Tip: Keep that app password safe – you might need it again later!
2. Restricted Gmail SMTP Server (aspmx.l.google.com)
Who is it for?
Organizations or devices (like printers or scanners) that need to send non-sensitive, transactional emails without authentication.
How it works:
This method is often used by devices or apps that can’t log in with a username and password. It has strong limitations and should only be used for internal or low-risk messages.
How to set it up:
- SMTP Server: aspmx.l.google.com
- Port: 25
- Authentication: Not required
- Security: No SSL/TLS
- Sender: Must be a Gmail or Google Workspace account
- Recipient: Must be a Gmail or Google Workspace address
Common uses:
- Network printers or scanners sending scan-to-email messages within a company
Notes:
- No authentication, so it’s less secure
- Only works for sending to Gmail or Google Workspace accounts
- Strict sending limits
3. G Suite (Google Workspace) SMTP Relay Service
Who is it for?
Organizations using Google Workspace (formerly G Suite) for their domain (e.g., you@yourcompany.com).
How it works:
This method lets businesses send emails from apps, devices, or other email servers using Google’s infrastructure, but with more flexibility and higher sending limits than the regular Gmail SMTP server.
How to set it up:
- SMTP Server: smtp-relay.gmail.com
- Port: 587 (TLS), 465 (SSL), or 25
- Authentication: Can use IP address whitelisting, or require sign-in with a Google Workspace account
- Security: TLS or SSL recommended
- Sender: Can be any address within the organization’s domain
Common uses:
- Sending bulk emails, notifications, or transactional messages from business apps or devices
- Scanning devices or systems that need to send email on behalf of your business
Notes:
- Higher daily sending limits (up to 10,000 recipients/day)
- Can be restricted to allow only certain IPs or domains
- Requires Google Workspace (not available to free Gmail accounts)
- More secure and flexible for business use
What is IMAP and How to Configure Gmail for IMAP Access?
What is IMAP?
IMAP stands for Internet Message Access Protocol.
It’s a standard email protocol that allows you to access and manage your emails directly on the mail server from different devices.
With IMAP, your messages and folders stay synced across your phone, computer, and any other device you use to check your email.
This means if you read, delete, or move a message on one device, it looks the same everywhere.
How to Configure Gmail for IMAP Access
To set up Gmail for IMAP access, follow these steps:
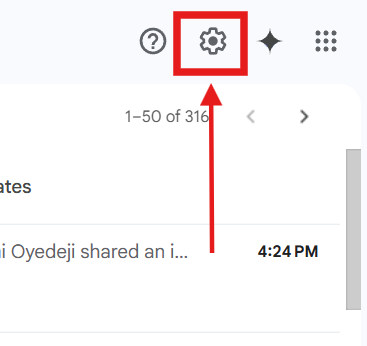
- Log in to your Gmail account and click the Settings (gear) icon in the top right corner.
2. Click on See all settings, then go to the Forwarding and POP/IMAP tab.

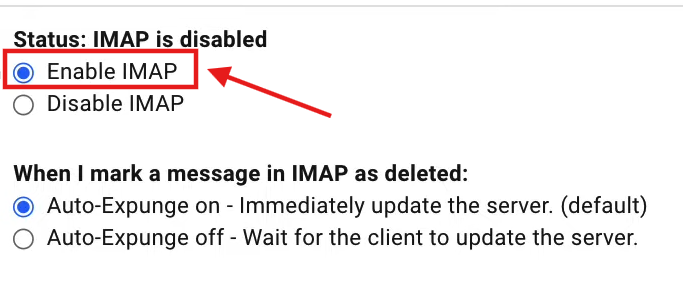
3. In the IMAP Access section, select Enable IMAP.
4. Click Save Changes at the bottom.
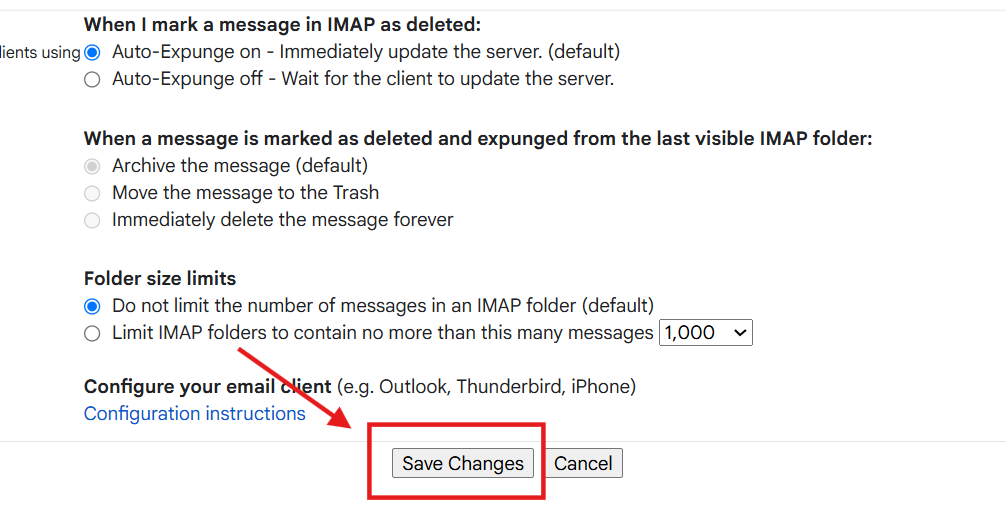
5. Open your third-party email client (like Outlook, Apple Mail, or Thunderbird).
6. When asked for incoming mail server details, enter:
- Incoming Mail Server (IMAP): imap.gmail.com
- Port: 993
- SSL: Yes (required)
- Username: your full Gmail address
- Password: your Gmail password
- Display Name: your name
After following these steps, your Gmail account will be set up to use IMAP, keeping your messages in sync across all your devices.
Frequently Asked Questions
Why am I getting authentication errors when setting up Gmail SMTP?
Authentication errors can happen for several reasons:
- Your username or password is incorrect.
- If you have 2-step verification enabled, you need to use an App Password instead of your regular Gmail password.
- “Allow less secure apps” is disabled (for accounts that don’t use 2-step verification).
- Your Google account may be blocking sign-in from the app or location due to suspicious activity.
How can I use Gmail SMTP with 2-step verification enabled?
When 2-step verification is turned on, you can’t use your regular Gmail password in third-party apps. Instead, you need to generate an App Password:
- Go to your Google Account > Security > App Passwords.
- Create a new App Password for your email client or app.
- Use this 16-character password in place of your usual Gmail password in the SMTP settings.
Are there daily sending limits when using Gmail SMTP?
Yes, Gmail imposes daily sending limits to prevent abuse:
- Regular Gmail accounts: Up to 500 emails per day.
- Google Workspace (business) accounts: Up to 2,000 emails per day.
If you exceed these limits, your account may be temporarily restricted from sending more messages.
Can I use Gmail’s SMTP server to send emails from other email addresses or domains?
Gmail’s SMTP server allows you to send emails from other addresses if you have verified them in your Gmail settings. However, messages will still be sent through your Gmail account, and some recipients may see “sent via gmail.com” or similar. For sending on behalf of a custom domain (e.g., you@yourcompany.com), using Google Workspace is recommended for better deliverability and branding.
